HybridDX Antenna - Part 1 build and install
I came across the HybridDX antenna after reading the lastest copy of QST magazine (June 2020 bottom pg. 83). So, I thought I would get one of them and give it a go. This page shows photos of the build, how I went about building the antenna and analyzer shots of the antenna with my current setup once, I had it installed.
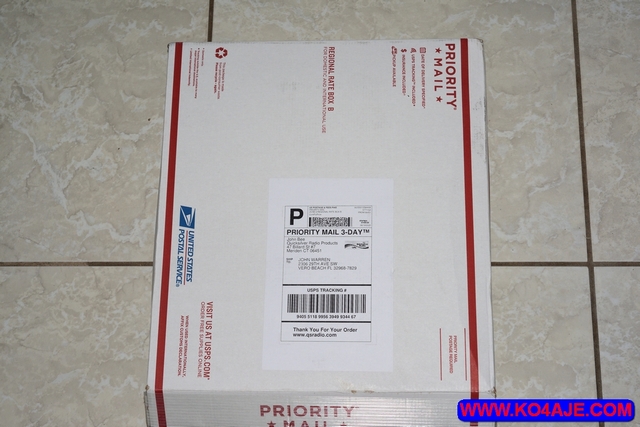
The package arrived by USPS priority mail 3-day.

All the parts for the antenna were packed into a sealed bag and all the parts were in their own seperate bag which, were marked with letters.
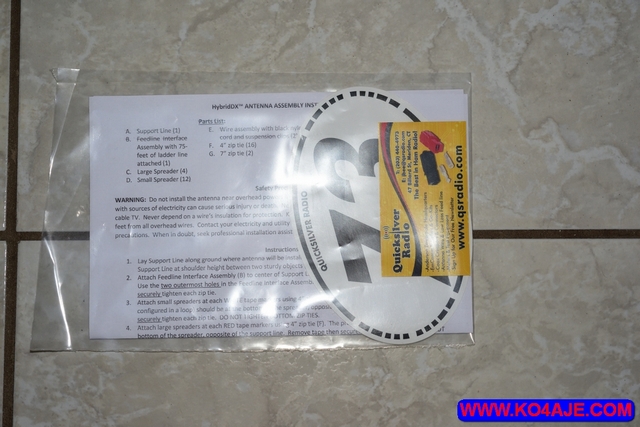
The bag with the instructions also came with a business card and a 73's sticker from Quicksilver Radio.
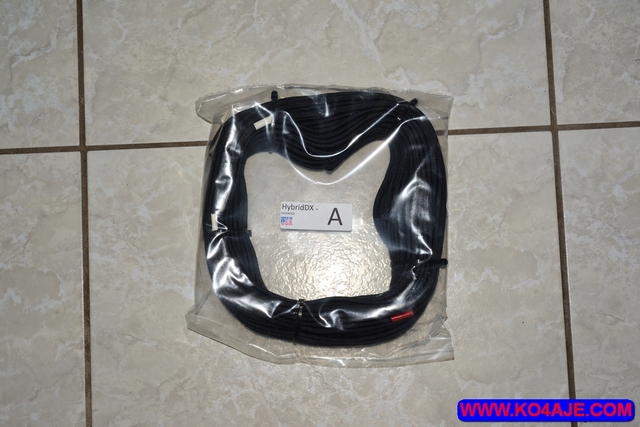
Bag "A" contains the support rope that you build the antenna out on.
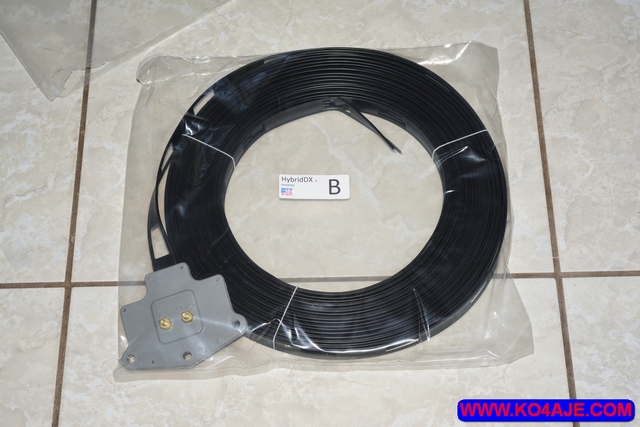
Bag "B" contains the center feedline interface assembly with 75 feet of ladder line attached.

Bag "C" contains the Large spreaders which make up the V shapes near the end of the antenna.
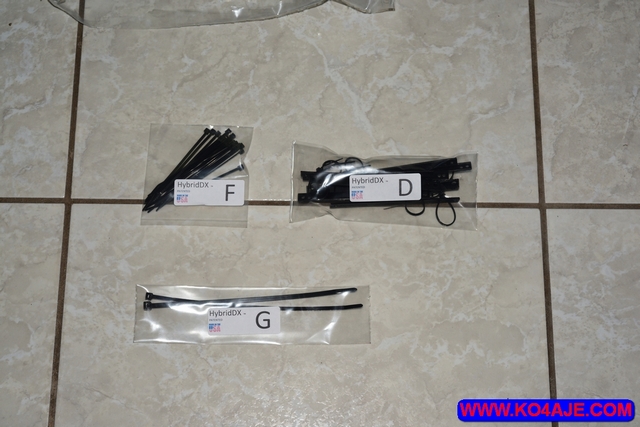
Bag "D" contains the small spreaders. Bag "F" contains the zip ties for all spreaders (D and C). Bag "G" contains the two zip ties to attach the center feedline interface to the support line (A).

Bag "E" (2) are the wires that make up each side of the antenna.
Note - You will need a pair of snips to trim the zip ties and a pair pliers or wrench for the center interface nuts.
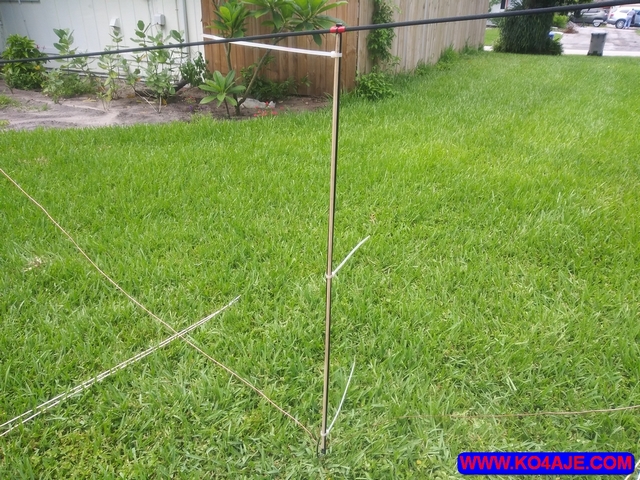
First step - I read through the instructions ahead of time, to get familiar with whats needed to be done to build the antenna. Everything looked pretty straight forward so, when I had time to get to it and it was not raining, I got started. The instructions say to lay out the support line either on the ground near where you are going to string up the antenna or tie it up about shoulder height. I had a couple of tripods and some sand bags that worked out great for this.
IMPORTANT NOTE - I cannot stress the importance of laying this out where you are going to hang it. When I built this antenna, I could not place it where I wanted to hang it and later had to move it into hanging position. Let me tell you! This is not an antenna you want to move around and you should avoid this if, at all possible. After getting it all setup and then trying to move it, I had to readjust all the spreaders and wire. So, save yourself a lot of time and try to build it where it is actually going to be hung.
Second step - I attached the feedline assembly to the support rope and centered it to the blue tape maker. I was not sure if, I was supposed to simply zip tie the interface to the support rope or run the support rope through the holes and then zip tie it so, I decided to do the later. I threaded the support rope through the two outer holes of the interface, carefully, making sure I did not move any of the tape markers on the way to the center and then, centered it to the blue tape maker. The instructions say to then, remove the tape but, I left them in place for photos.
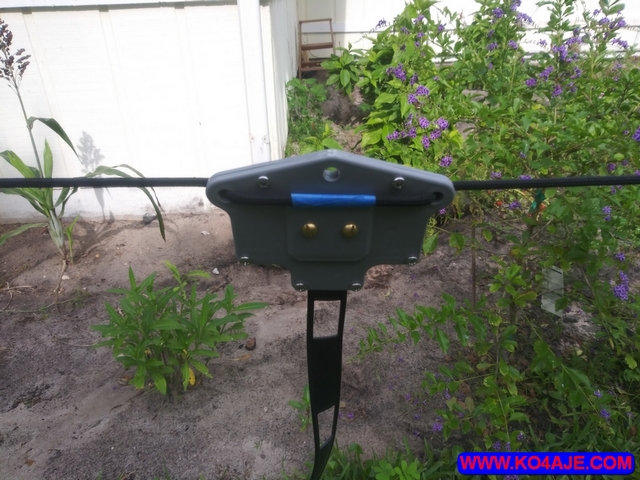
I used the two zip ties in bag "G" to zip tie the line to the interface and then trimed the excess.

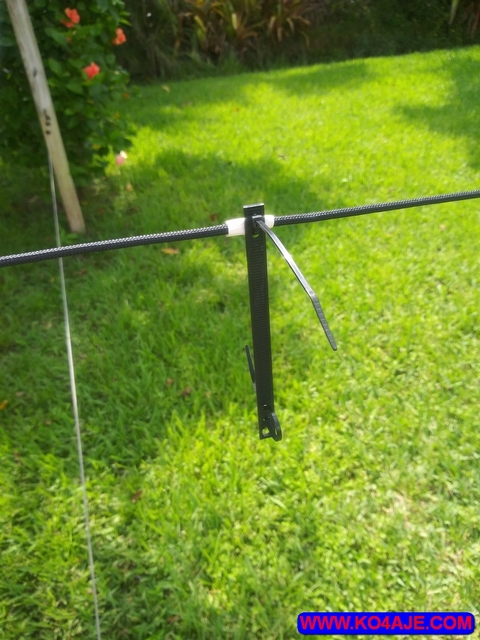
Third step - Attach the small spreaders to the support rope at the WHITE tape markers, using the 4 inch zip ties from bag "F". There are zip ties preinstalled on the small spreaders, this is the bottom of the spreader and this is where your wire will go, Do not use the bottom zip ties yet and do not tighten them up.
Fourth step - Attach the large spreaders at each RED tape maker on the support line, using the remaining 4" zip ties in bag "F". The large spreaders have zip ties at the bottom just like the small spreaders; don't use them and keep them open. Mount the large spreaders the same way the small spreaders were mounted.
Fifth step - Now comes stringing the wire through the bottom zip ties on all the spreaders. Each wire has clips and string on the end of the wire that hangs down, the other end is what you string through the spreaders. The clips, are used to swag the ends up toward the center of the antenna, toward the center interface assembly. Before I tried to string the wire through the spreaders, I loosened each nut on the center interface assembly and attached the wire there, to hold on to it while, unwinding the wire out toward each end. I used an unrolling motion, to lay out the wire to eleminate curls in the wire and avoid getting kinks. Attaching the end of the wire to the nut, helped keep the wire from rolling back toward me. Once the wire was rolled out, I unattached the wire from the center interface assembly, went to the end with it and started running it through the bottom zip ties on all the spreaders, watching that no kinks develope while pulling it through each zip tie and reattached the wire to the center interface which, is the sixth step of the instructions. I then worked my way back to the end straightning the wire as I went and tightening each bottom spreader zip ties, this was in the eighth step.
NOTE - The longest spreaders were curling upwards, even with the wire, which, would not keep them in a straight shape. So, I used some 3/8" wood dowels and zip tied them to the spreaders to keep them straight.
Sixth step - Done.
Seventh step - Starting from the center interface, remove any slack in the wire, between the spreaders and straighten the spreaders. When there is no slack wire between each spreader, the instructions indicate there should be 27' - 10" of wire remaining outside, the end of the small spreader. However, when I measured the remaining wire, I found 31' - 3" at each end. I did not trim the wire at this point and wanted to get it in the air and check it with the analyzer before I trimmed it.
Eighth step - Done
Ninth step - Once you have made sure all zip ties are tight trim off excess.
Tenth step - To attach the end clip or not. Since, the end that hangs down is (mine 31' - 3") long, you will want to get the antenna 10' higher than the lowest point of the wire that hangs down so nobody comes into contact with it while you are transmitting. If, you plan on hanging the antenna at 40' or more you will be fine. This is going to be difficult for a lot of people so, it's nice to have the option to swag the end wires up toward the center. Just know, the swag will still hang down to approximentally 17'.
Elevth step - Hang the completed antenna using the knoted-loop ends of the support line. My support line did not have any knotted loops but, that's OK, I know how to make one.
Twelth step - Refer to the web site for rig connection and tuning instructions. Well, I knew how I was going to rig it up because I knew I had to use a couple of tall trees on my property. As far as tuning the antenna goes, I decided to wait and see what the antenna looked like on the analyzer first and what it looked like using different senerios (i.e. ladder line vs coax) which, is something that will be done in future steps but, for now, the antenna is up and not too far off an SWR of 3 to tune with the MFJ - 989D tuner. Some bands though, are near an SWR of 10 and may be difficult to tune. However, as of this writing, I have tried the antenna on 80 and 40 and was able to tune up and use my Ameritron AL-811H amplifier at 600 watts. The tune up is a little tight though, due to the higher SWR's which, requires retuning if you move to another frequency within the same band.
The screen shots below, show what I saw on the Mini600 antenna analyzer that has been calibrated at 50 ohms reference (Z0=50). This is the current setup from the antenna analyzer out to antenna which, is swagged:
Mini600 antenna analyzer connected to 11 feet of RG-8X which, runs out of the shack and through the wall to a 4:1 balun box. The entire length of ladder line that came with the HybridDX antenna (75 feet) attaches to the balun box. The antenna is at approx. 35 feet on each end and the center droops to about 30 or so feet. This is straight out to the antenna and there is no tuner in line.

100 mHz sweep from 1.5 mHz
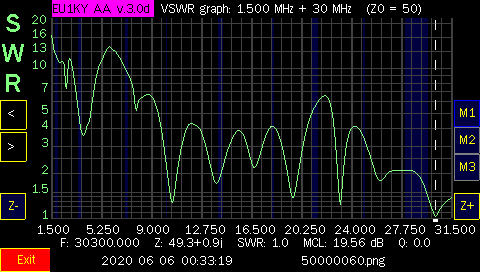
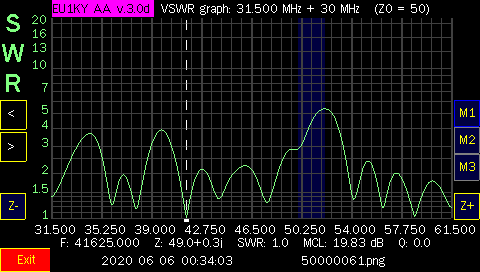
2 scans from 1.5 mHz @ 30 mHz sweep
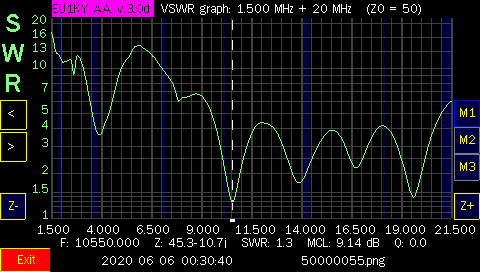
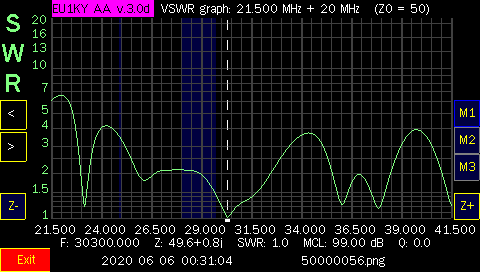
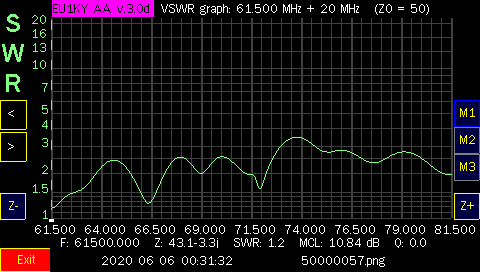
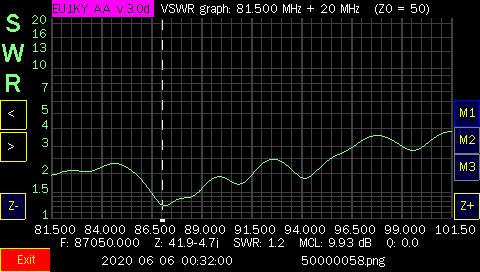
4 scans from 1.5 mHz @ 20 mHz sweep
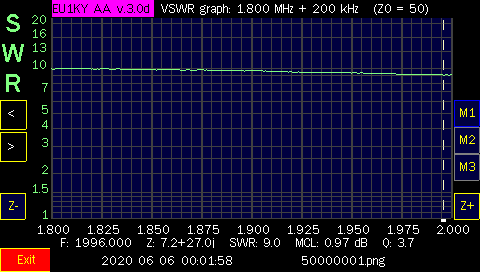
160 meter band sweep
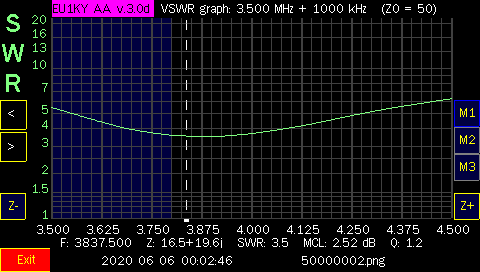
80 meters band sweep
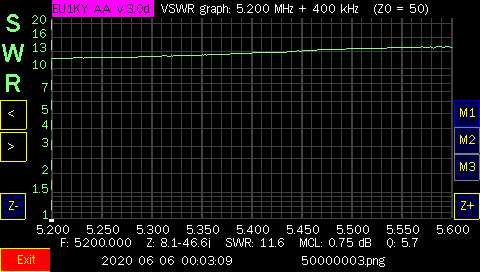
60 meters band sweep
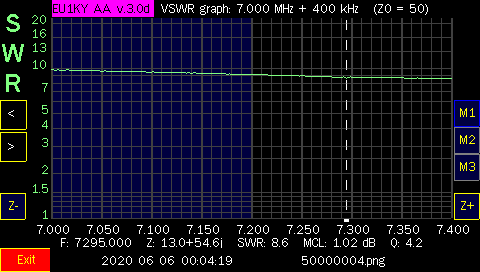
40 meters band sweep
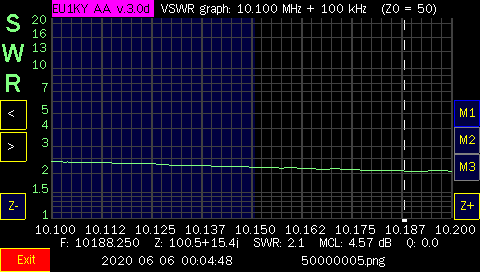
30 meters band sweep
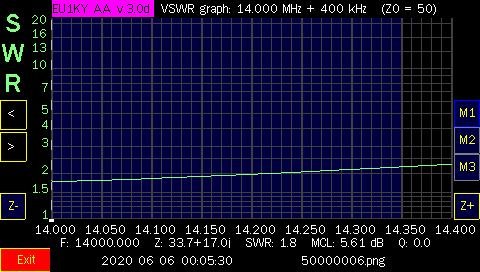
20 meters band sweep
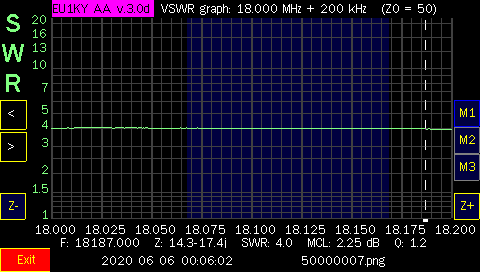
17 meters band sweep
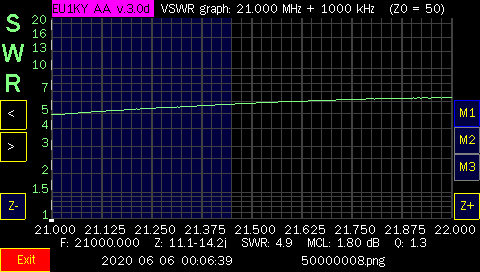
15 meters band sweep
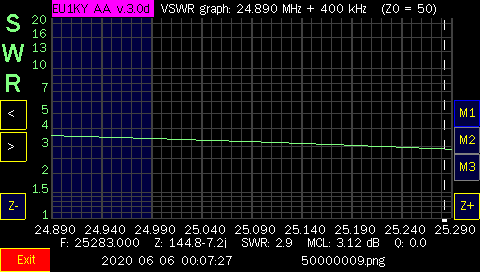
12 meters band sweep
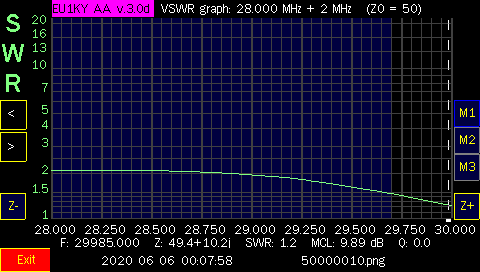
10 meters band sweep
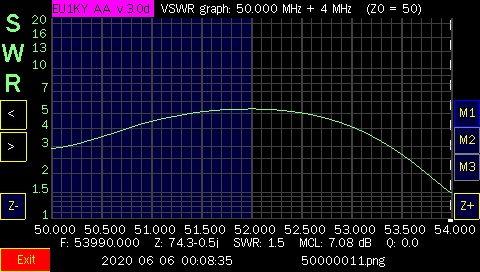
6 meters band sweep

2 meters band sweep
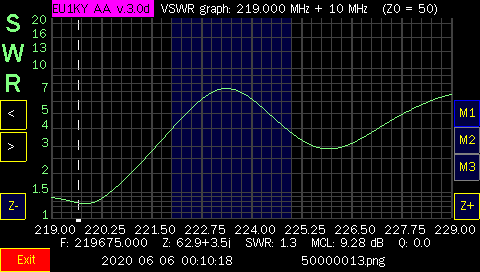
1.25 meters band sweep
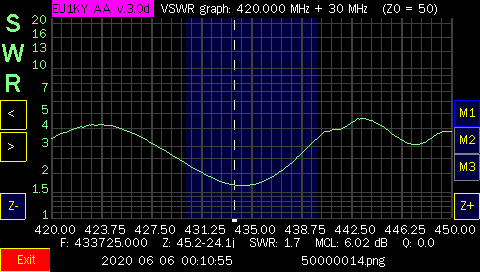
70 centimeters band sweep